 English
 Français
Edit Real Estate Photos to make every property listing stand out and attract serious buyers. Real estate photography is more than just taking pictures—it’s about capturing the essence of a property in a way that sells. In today’s competitive housing market, high-quality, well-edited images can mean the difference between a quick sale at asking price and a listing that sits unsold. Buyers form their first impression online, making it essential that your photos showcase every room, feature, and finish in its best light. That’s why knowing how to edit real estate photos professionally is crucial for agents, photographers, and homeowners alike. This step-by-step guide will walk you through the entire editing process to help you create polished, appealing images that drive results.
Why Editing Real Estate Photos Matters
Professional real estate photo editing isn’t just an option—it’s a necessity. Listings with beautifully edited photos don’t just look better; they sell faster and often for higher prices. Buyers expect clear, bright, and realistic images that help them visualize living in the space. Poor lighting, color casts, distorted lines, and cluttered compositions can all detract from a property’s appeal. Editing corrects these issues, enhances a property’s best features, and creates a consistent, professional look across all your marketing channels. By investing time in editing, you’re investing in the perception of quality and trust that persuades buyers to schedule a showing or make an offer. If you want your property to stand out in a crowded marketplace, great photos aren’t enough—they have to be expertly edited.
Tools You’ll Need to Edit Real Estate Photos
Step-by-Step to Edit Real Estate Photos
Editing real estate photos is a multi-step process that transforms ordinary shots into striking, professional images that sell. By following these steps, you’ll ensure every photo you deliver is polished, appealing, and ready to impress buyers.
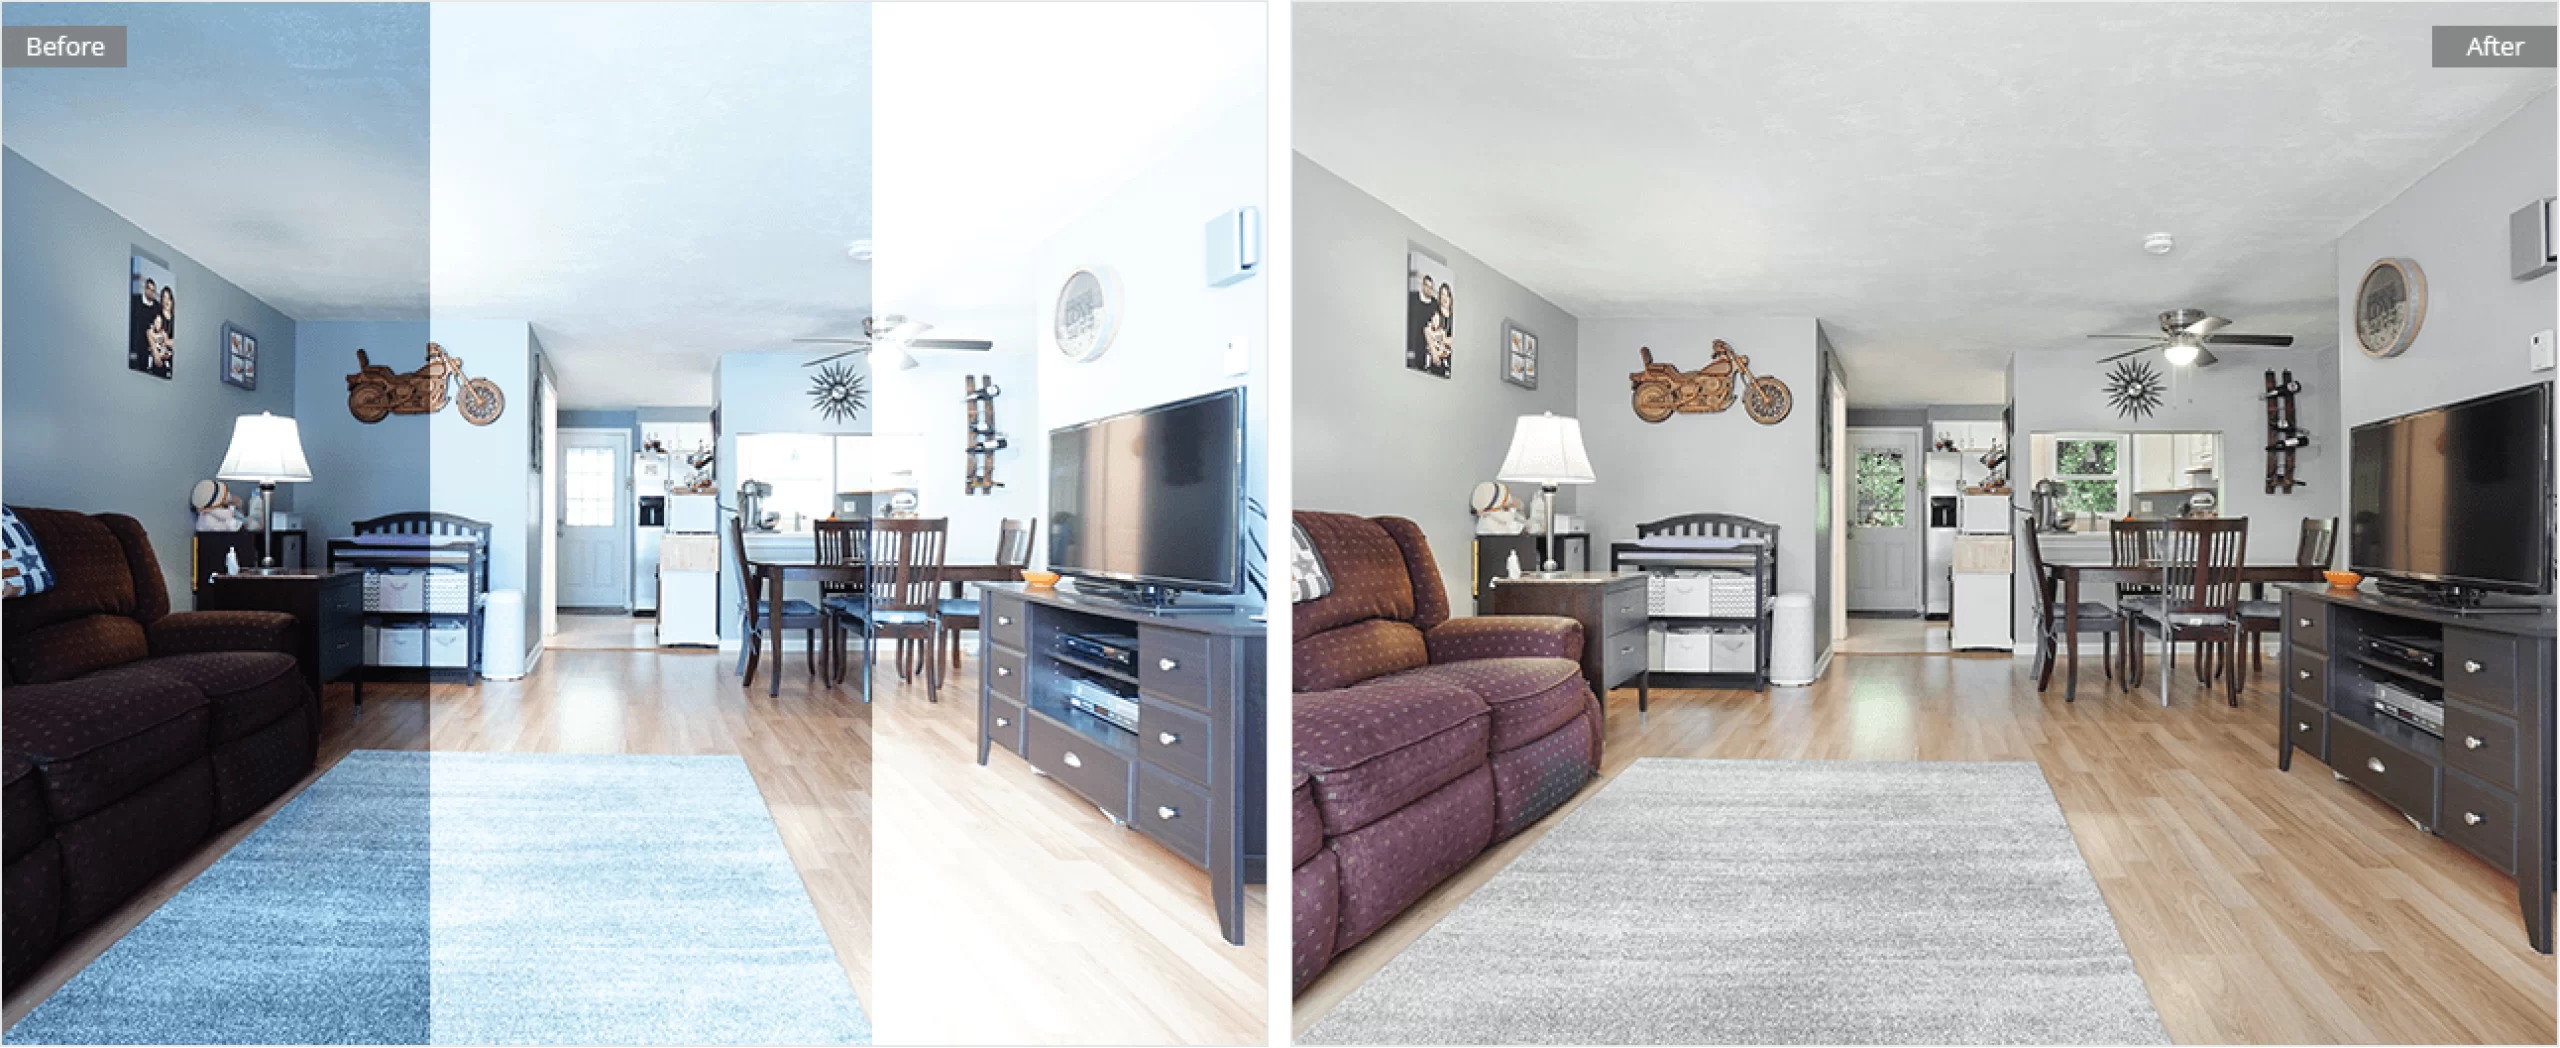
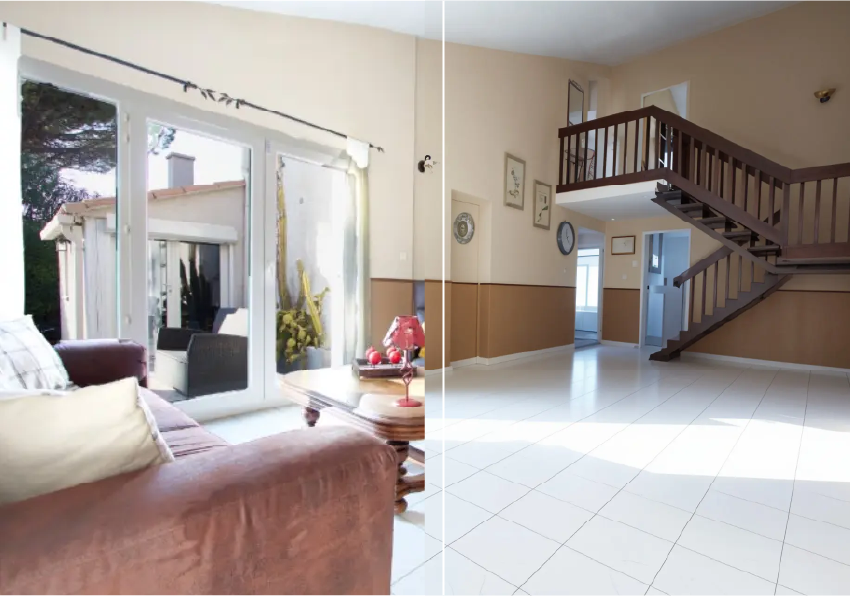
1. Basic Brightness and Exposure Adjustment

The first step when you edit real estate photos is to correct brightness and exposure so the space feels inviting and balanced. Dark interiors can appear gloomy and unappealing, while overexposed highlights can wash out important details. In Lightroom or Photoshop, adjust the exposure sliders to achieve even lighting. Bring up the Shadows to reveal hidden details and reduce Highlights to maintain balance. This foundational step ensures your photos feel bright, open, and true to life.
2. HDR Blending / Merging
High Dynamic Range (HDR) is essential for real estate photography because it balances the bright light of windows with darker interior areas. To create an HDR image, take multiple bracketed exposures at different settings and merge them in Lightroom or Photoshop. This process combines the best elements of each shot, delivering a final image with clear, balanced lighting that showcases the property’s details in every corner.
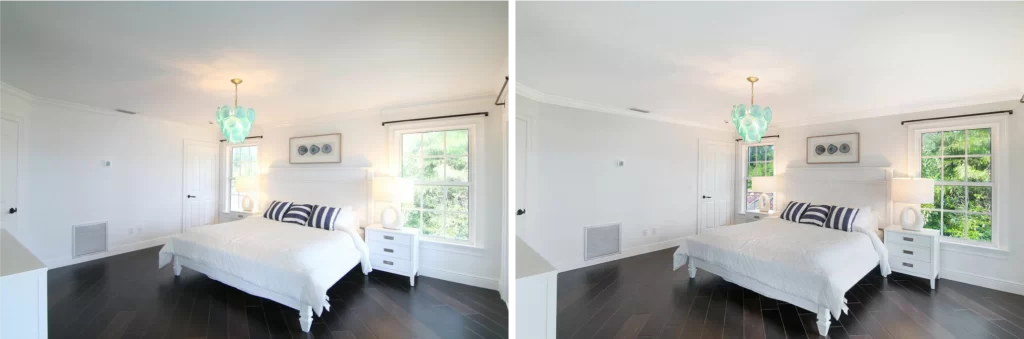
3. Color Correction

Editing real estate photos also means ensuring accurate, realistic color. Lighting variations can create unwanted color casts—warm, yellow tones from incandescent bulbs or cool, bluish tints from fluorescents. Use the White Balance tool to neutralize these shifts. Adjust Tint and Temperature sliders carefully so materials and finishes look true to life. Accurate color builds trust with buyers and ensures the space feels welcoming and natural.
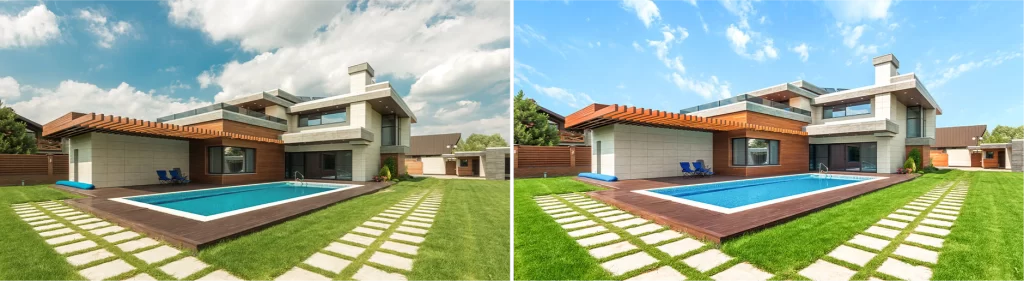
4. Hue and Saturation Enhancements
After correcting overall color, fine-tune specific hues to highlight property features. Greens in lawns and gardens, blues in pools and skies, and warm interior tones all benefit from subtle enhancement. Lightroom’s HSL panel or Photoshop’s Hue/Saturation layers allow you to selectively increase vibrancy without making the image look artificial. This step helps your photos stand out while maintaining a professional, realistic finish.
5. Lens and Perspective Corrections
Wide-angle lenses often introduce distortion, making vertical lines converge or bend unnaturally. To edit real estate photos professionally, correct these distortions using Lightroom’s Upright feature or Photoshop’s Transform tools. Straightening vertical and horizontal lines is crucial for interiors, ensuring walls and door frames appear solid and true to the space, not warped or leaning.
6. Noise Reduction
Low-light shots, long exposures, or high ISO settings can introduce digital noise that makes images look grainy and unprofessional. Reduce noise using Lightroom or Photoshop’s dedicated tools while preserving important details. Smooth, clear photos look sharper, cleaner, and more appealing to buyers browsing online listings.
7. Cropping and Composition
Even great shots can benefit from thoughtful cropping. Adjust framing to remove distractions, improve balance, and focus attention on the property’s best features. Maintain appropriate aspect ratios for MLS requirements and social media. Good composition ensures your photos feel professional and visually pleasing, drawing the viewer’s eye exactly where you want it.
8. Image Composites
For advanced edits, blend multiple exposures manually using layers and masks in Photoshop. Combining ambient and flash shots can deliver perfectly balanced lighting without harsh shadows or overexposed highlights. This technique is especially valuable for tricky interiors or mixed-light scenarios where single-shot editing can’t capture the full range of detail.
9. Object Removal
Unwanted items—power cords, clutter, cars in driveways—can distract buyers and make a space look unkempt. Use Photoshop’s Clone Stamp and Healing Brush tools to remove these distractions seamlessly. Clean, clutter-free images help buyers focus on the property’s best features without visual noise.
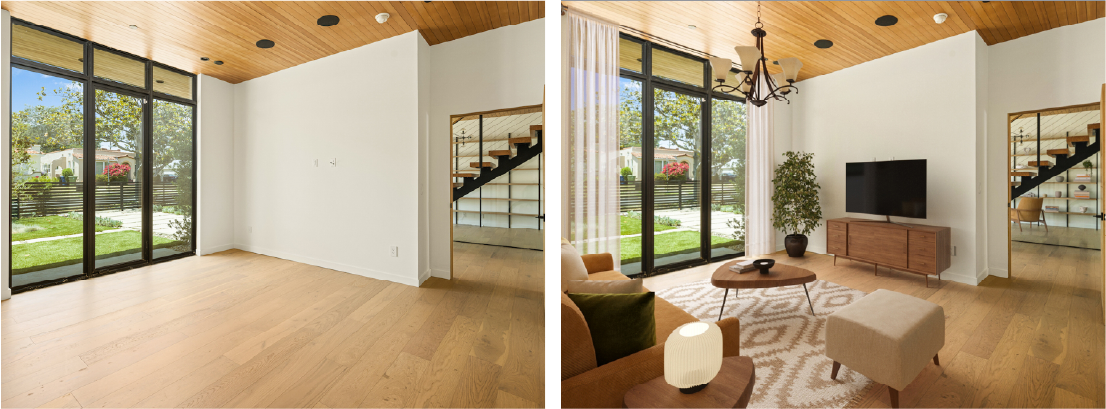
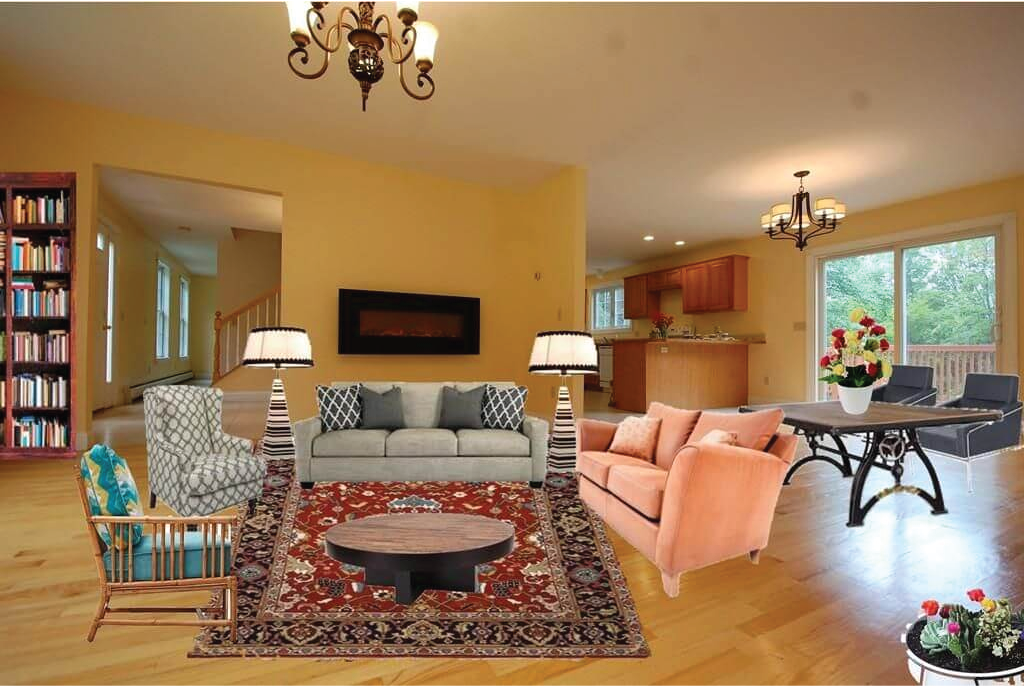
10. Object Addition / Virtual Staging
Sometimes, adding elements to a photo can transform its appeal. Virtual staging places furniture and décor into empty rooms, helping buyers imagine living in the space. Photoshop’s layering and masking tools enable realistic additions, from subtle décor accents to complete room furnishings, making empty properties feel warm and inviting.
Want to make your listings even more appealing? Visit our WeFixPix Virtual Staging Service to see how we can transform empty spaces into beautifully furnished, irresistible homes. Bring your property photos to life and help buyers envision their future—contact us today to get started!
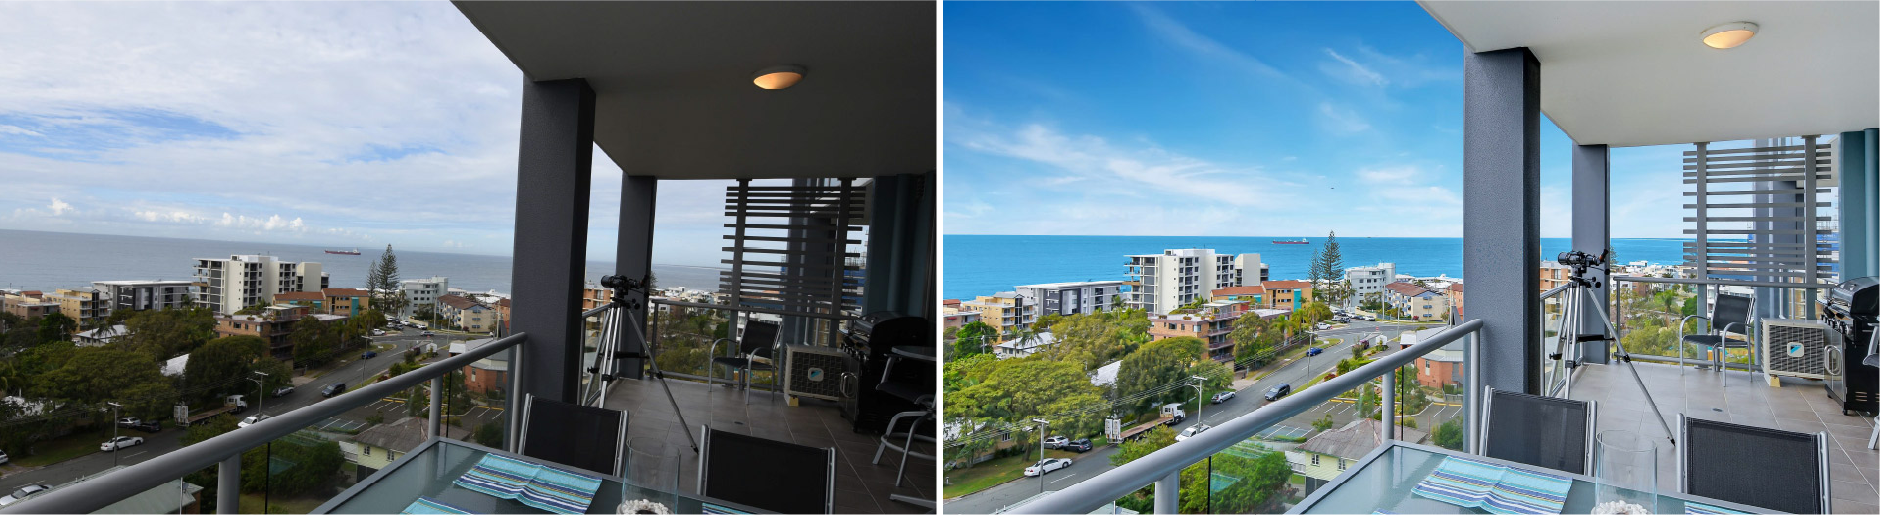
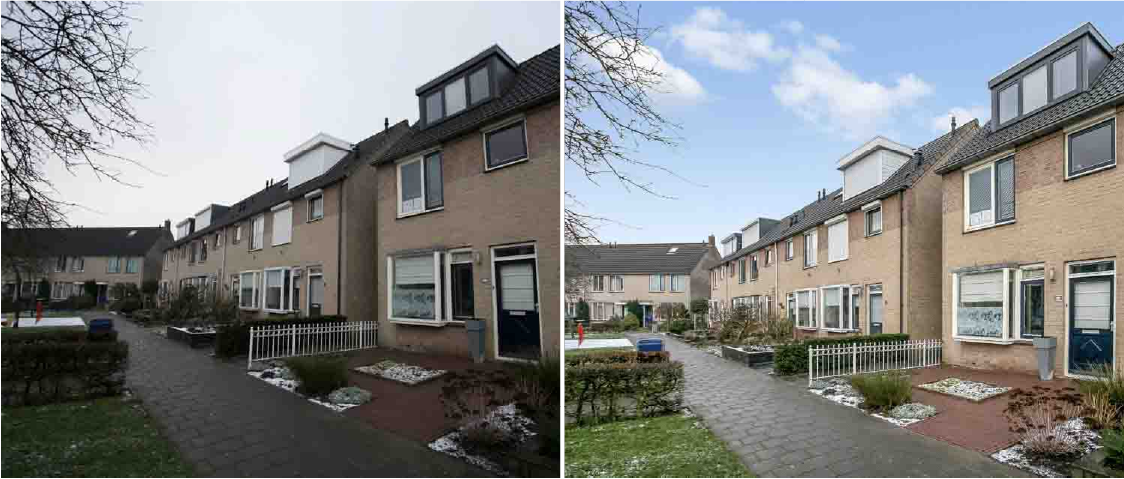
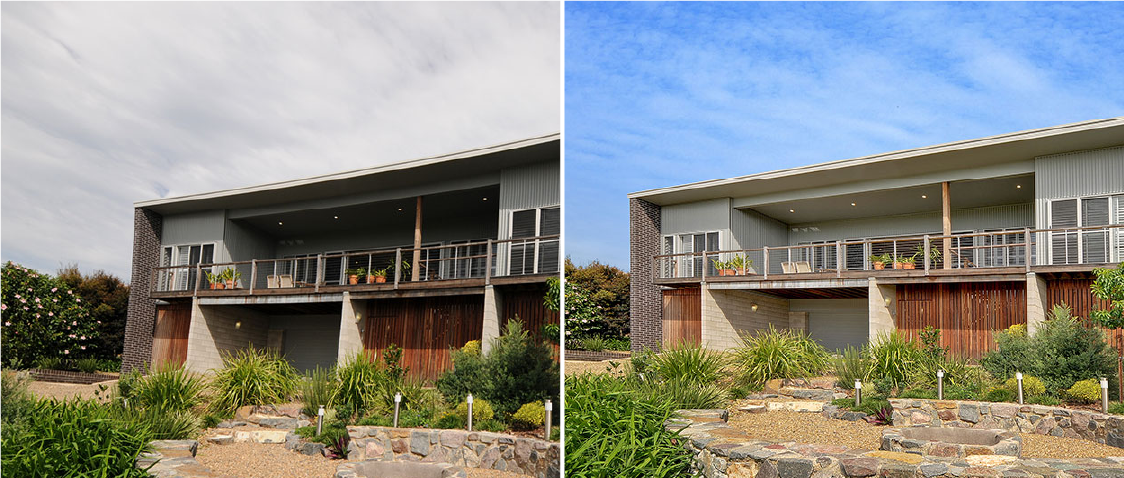
11. Sky Replacement
Cloudy, dull skies can drag down an otherwise beautiful exterior shot. Photoshop’s Sky Replacement tool makes it easy to swap gray skies for vibrant blue with realistic light matching and reflections. This quick enhancement can dramatically improve curb appeal and make exterior shots pop.
12. Reflection Removal
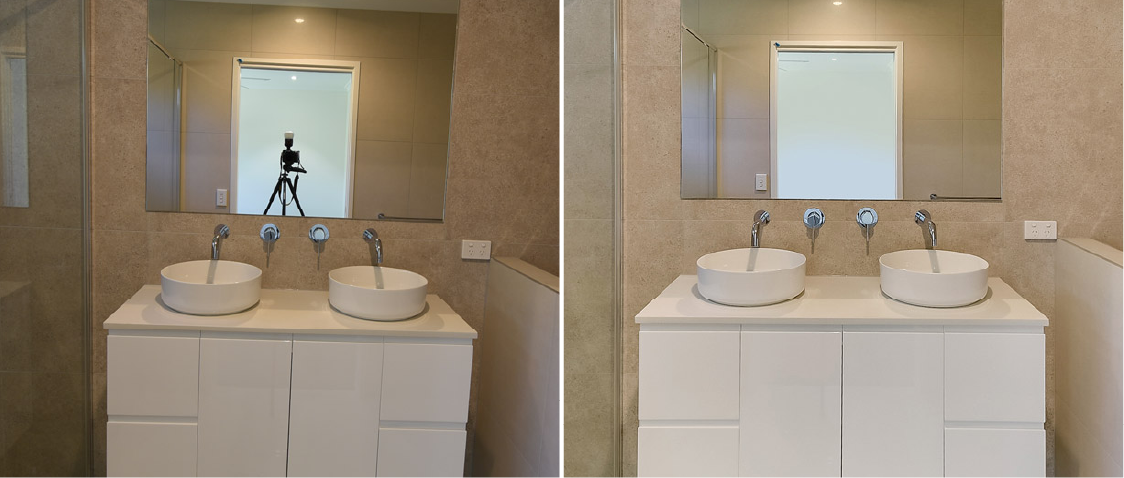
Reflections in windows and mirrors can introduce unwanted highlights or distracting duplicates of objects. Clone and Healing tools help paint over reflections or remove them entirely. Clean, clear surfaces look professional and help buyers see the true space without distraction.
13. Advanced Layer and Mask Editing
For the most precise control, use Photoshop’s layers and masks. Non-destructive editing allows you to fine-tune adjustments without permanently altering the original image. Layers let you separate edits for easy tweaking, while masks target adjustments to specific areas for truly professional results.
14. Batch Processing for Consistency
When editing large sets of real estate photos, consistency is key. Lightroom’s Sync settings and Photoshop Actions let you apply identical edits across entire shoots, saving time and ensuring all images share the same polished, cohesive look. This uniformity is critical for maintaining a professional brand and delivering a consistent experience for clients.
WeFixPix is an expert in editing real estate photos. Contact us today to speak with an expert consultant and learn how we can help transform your property photos into powerful, effective marketing tools.
Common Mistakes to Avoid When You Edit Real Estate Photos
Even if you know how to edit real estate photos step by step, it’s important to avoid these common mistakes that can make your images look unprofessional:
-
Over-Editing: Pushing saturation, HDR effects, or sharpening too far can make photos look unnatural. Buyers want realistic, trustworthy images that show the property as it truly is.
-
Ignoring Perspective Corrections: Crooked vertical or horizontal lines can make rooms feel uncomfortable or oddly shaped. Always straighten walls, doors, and windows for a professional finish.
-
Inconsistent Lighting: Photos from the same property should have matching brightness, color tones, and overall style. Inconsistent edits can look sloppy and confuse buyers.
-
Leaving Clutter and Distractions: Objects like cords, cars in driveways, or personal items can draw attention away from the property’s features. Always remove these distractions during editing.
-
Failing to Correct Color Casts: Artificial lighting can add unwanted tints (yellow, blue) to images. Be sure to neutralize these for natural, true-to-life color.
-
Neglecting Noise Reduction: Grainy, noisy photos from low-light shooting or high ISO settings can appear unprofessional. Use noise reduction tools to create smooth, clear images.
These mistakes can undermine even the best photography. Avoid them to deliver polished, appealing images that truly sell.
Real more: Top Real Estate Photo Editing Mistakes
WeFixPix is an expert in editing real estate photos. Contact us today to speak with an expert consultant and make sure your property photos stand out for all the right reasons.