 English
 Français
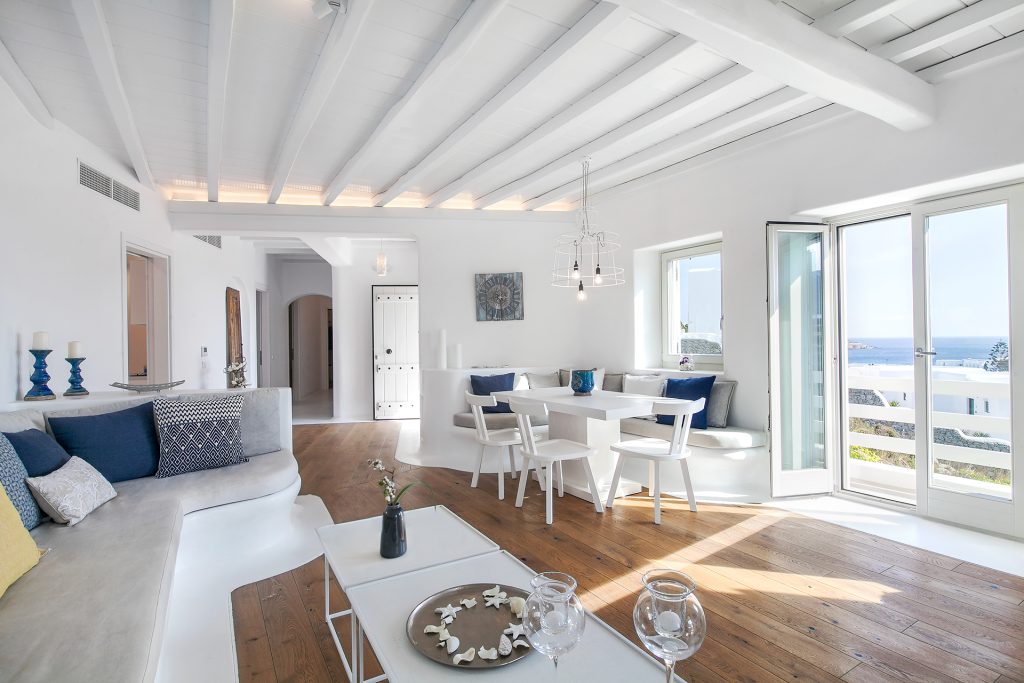
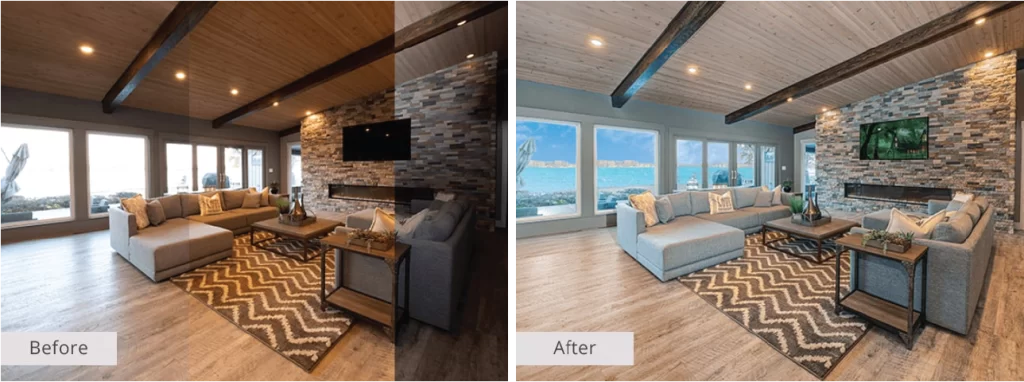
HDR Real Estate Photos are no longer just a trend—they’re a proven tool for capturing attention and driving results in today’s competitive property market. With vibrant colors, balanced lighting, and enhanced detail, HDR photography showcases homes in their best light—literally. In fact, listings with HDR real estate photos can sell up to 50% faster and receive 118% more online views than standard images.
But here’s the challenge: creating perfect HDR real estate photos requires more than just a good camera. From shooting multiple exposures to blending them seamlessly and retouching for natural appeal, the process demands technical skill and time.
That’s where WeFixPix comes in. Our HDR Real Estate Photo Editing service helps agents, homeowners, and photographers transform raw images into polished, professional photos that make listings stand out—and sell. Whether you’re capturing luxury interiors or tricky lighting conditions, we deliver fast, flawless edits tailored for real estate ads.
Ready to create scroll-stopping real estate visuals? Let’s get started.
Read more: Why Professional Real Estate Photos Are Crucial in 2025?
1. What Are HDR Real Estate Photos?
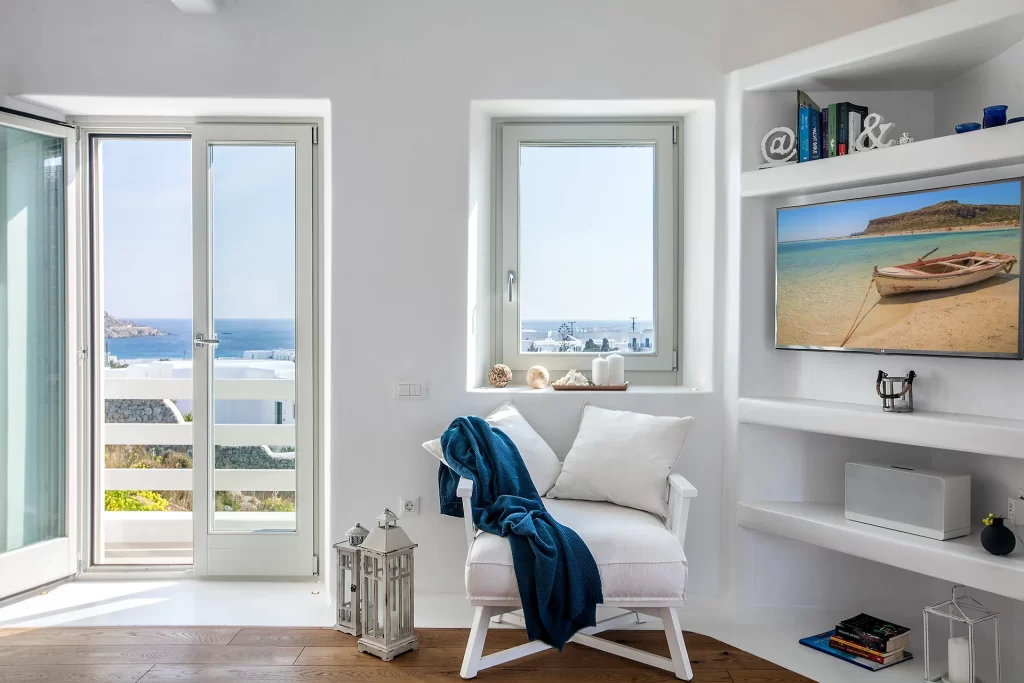
HDR Real Estate Photos are images created by blending multiple shots of the same scene taken at different exposure levels—usually underexposed, properly exposed, and overexposed. This technique allows photographers to capture the full range of light in a space, from the darkest shadows to the brightest highlights, in a single well-balanced image.
In real estate, this is especially useful when shooting interiors with bright windows or exteriors with complex lighting. A standard photo might either blow out the window view or leave the room looking too dark. But with HDR, you get both: a clear, vibrant interior and a visible, natural-looking view outside.
Key Benefits of HDR Real Estate Photos:
-
Balanced Lighting: Retains detail in both bright and dark areas
-
True-to-Life Colors: Accurately represents the space without looking artificial
-
Professional Presentation: Enhances a property’s appeal with rich depth and clarity
Think of HDR as the closest thing to what the human eye actually sees. Instead of compromising between shadow and light, you get the best of both worlds—making your listings more attractive and emotionally engaging.
At WeFixPix, we specialize in turning raw, bracketed exposures into seamless, high-quality HDR real estate images that impress potential buyers and boost your ad performance.
2. Equipment & Shooting Setup
To capture stunning HDR Real Estate Photos, the right gear is just as important as technique. While professional editing can do wonders, starting with quality raw images ensures the final result is sharp, balanced, and impactful.
Essential Equipment for HDR Real Estate Photography:
-
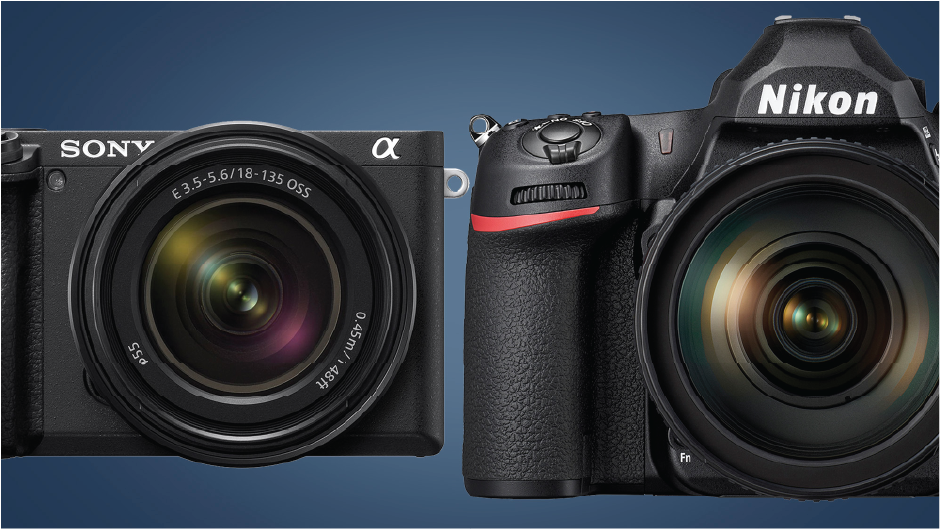
DSLR or Mirrorless Camera
Your camera must support Auto Exposure Bracketing (AEB)—this function allows it to take multiple exposures of the same scene automatically. -
Wide-Angle Lens (12–24mm recommended)
A wide-angle lens helps showcase full rooms and spacious interiors without excessive distortion. -
Sturdy Tripod
Stability is crucial. Since HDR requires taking several shots in quick succession, a tripod ensures all frames are perfectly aligned and blur-free. -
Remote Shutter or Timer
Even the tiniest shake can cause ghosting in HDR photos. Use a remote trigger or self-timer to avoid touching the camera. -
RAW Format
Always shoot in RAW to capture the highest level of detail and editing flexibility.
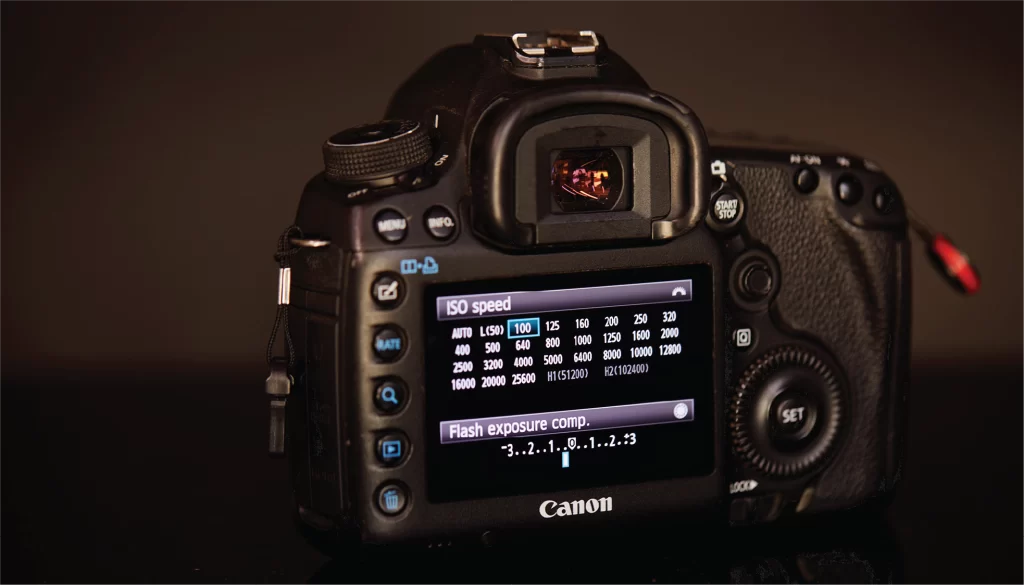
Recommended Camera Settings:
-
Aperture: f/8 to f/11 (for sharpness and depth)
-
ISO: 100–400 (keep it low to reduce noise)
-
White Balance: Manual setting (to avoid color shifts)
-
Bracketing: 3–5 exposures at ±2 EV (or up to 7 exposures in high-contrast scenes)
By capturing multiple images with varied exposures—one for shadows, one for midtones, and one for highlights—you lay the groundwork for a well-balanced HDR photo.
Tip: If you’re capturing photos with a mobile device or non-bracketed camera, no worries. WeFixPix can still create beautiful HDR-style images using advanced blending techniques and manual enhancements.
3. Step-by-Step HDR Shooting Process
Creating perfect HDR Real Estate Photos isn’t just about having the right equipment—it’s about using it with precision and consistency. Whether you’re shooting a cozy condo or a luxury estate, the following step-by-step process will help you capture high-quality bracketed exposures ready for HDR editing.
Step 1: Prepare the Space
-
Declutter rooms and tidy up—remember, less is more.
-
Turn on all lights, including lamps and under-cabinet lighting, to brighten the interior.
-
Open blinds or curtains if the outdoor view adds value to the room.
-
Hide personal items, trash bins, and cords to keep the frame clean.”
Step 2: Set Up Your Shot
-
Mount your camera on a tripod and level it using a built-in bubble or digital level.
-
Frame your composition, ideally from chest height, and ensure vertical lines (walls, doorways) are straight.
-
Use manual focus if possible for consistency across all exposures.
Step 3: Capture Bracketed Exposures
-
Use Auto Exposure Bracketing (AEB) to capture 3 to 5 shots at varying exposure values (e.g., -2 EV, 0 EV, +2 EV).
-
Use a 2-second timer or a remote shutter release to prevent motion blur.
-
Make sure nothing moves between shots—watch out for people, pets, trees, or passing cars.
Movement between exposures (like shifting shadows or moving curtains) can cause “ghosting” in HDR images. Steady scenes produce the best results.
Step 4: Review Your Sequence
-
Check the histogram of each exposure to ensure coverage of both shadows and highlights.
-
Confirm that no image is blown out or too dark to retrieve detail.
Once you’ve captured your bracketed images, you’re ready for the next phase: editing and blending them into a polished, professional HDR photo. If you’d rather skip the learning curve and save valuable time, let WeFixPix handle the editing—we’ll turn your shots into flawless real estate visuals, fast.
4. Editing HDR Real Estate Photos the Right Way
Capturing multiple exposures is only half the battle. The true magic of HDR Real Estate Photos happens in post-production—when those images are carefully blended, aligned, and retouched to create one seamless, natural-looking photo that’s ready for ads or MLS.
Step 1: Merge the Exposures
Using editing software like Lightroom, Photomatix Pro, or Aurora HDR, you’ll merge your bracketed images into a single composite. This process, known as “exposure fusion” or “tone mapping,” allows you to retain detail from both dark and bright areas without making the image look fake or overprocessed.
-
Auto-align layers to prevent ghosting or blur
-
Enable deghosting tools to remove unwanted motion artifacts (e.g., moving trees or cars)
-
Use batch processing for multiple image sets to save time
Step 2: Retouch for Balance and Clarity
After merging, fine-tune the image for color, light, and realism:
-
Adjust white balance to correct color temperature and prevent color casts
-
Recover shadows and highlights to ensure no detail is lost
-
Enhance contrast to add visual depth
-
Use lens correction tools to fix distortion, vignetting, or crooked lines
-
Apply dehaze and clarity selectively to maintain a clean, natural atmosphere
Great HDR editing should make a photo look real—not surreal. The goal is to mimic what the eye would naturally see when standing in the room.
Step 3: Optimize for Web or Print
Export your final image in high resolution, following platform standards:
-
Web ads/MLS: 2048×1365 px, 72 DPI
-
Print brochures: 4000×2666 px, 300 DPI
-
Format: JPEG, sRGB color space, compressed at 80–90% quality for balance
Want Perfect Results Without the Hassle?
At WeFixPix, we specialize in professional HDR Real Estate Photo Editing. Simply upload your bracketed exposures or RAW images, and our expert editors will:
-
Blend exposures seamlessly
-
Correct lighting, white balance, and perspective
-
Enhance clarity, detail, and overall aesthetics
-
Deliver high-resolution, ad-ready photos within 24 hours
Whether you’re shooting with a DSLR or even a mobile phone, our team ensures your photos look polished, consistent, and designed to sell.
5. Common Mistakes to Avoid When Create HDR Real Estate Photo
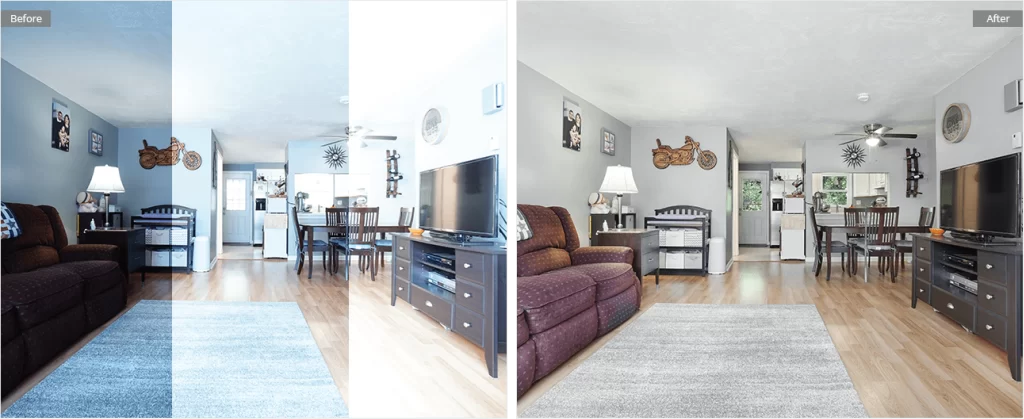
While HDR Real Estate Photos can dramatically improve your property marketing, they can also backfire if done incorrectly. Overprocessing, poor alignment, or bad lighting choices can make your images look unrealistic—or worse, unprofessional.
Here are some of the most common mistakes beginners make, and why trusting experienced editors (like WeFixPix) makes all the difference:
Over-Editing (Overcooked HDR)
When contrast is too harsh or colors are oversaturated, your photos start to look cartoonish. Overdone HDR can turn potential buyers off rather than draw them in.
✔ Fix: Keep edits subtle and natural. Prioritize realism over exaggeration.
Poor Alignment Between Exposures
Even slight camera movement can cause ghosting or double edges in your final image—especially noticeable on window frames, ceiling lines, or light fixtures.
✔ Fix: Use a sturdy tripod and auto-align exposures in post-processing.
Inconsistent White Balance
Mixing natural and artificial lighting (e.g., sunlight + warm bulbs) without correction can create color casts, making rooms look uninviting or misleading.
✔ Fix: Always adjust white balance manually and color-correct in editing software.
Loss of Window Views
A hallmark of professional HDR is the window pull—retaining both the interior detail and the outdoor view. Many DIY edits blow out the windows or leave them muddy.
✔ Fix: Carefully blend exposures to preserve dynamic range in bright areas.
Crooked Lines and Distorted Perspectives
Slanted walls or warped doorframes make photos look amateur. Perspective issues are especially common with wide-angle lenses.
✔ Fix: Use lens correction and vertical alignment tools to straighten geometry.
Even with the best intentions, it’s easy to miss these issues—especially when processing dozens of images per property.
That’s why so many real estate professionals rely on WeFixPix. Our trained editors spot these issues before they reach your clients—and fix them with precision, speed, and care. From ghost removal to subtle light balancing, we deliver high-impact HDR photos that feel real, clean, and designed to convert.
6. Why HDR Real Estate Photos Sell Better
If you’re still wondering whether HDR is worth the effort or investment, here’s the truth: HDR Real Estate Photos don’t just look better—they perform better.
The Numbers Speak for Themselves:
-
+118% more online views for listings with HDR photosUltimate Guide to HDR R…
-
50% faster sales compared to listings with standard images
-
$3,000–$11,000 increase in sale price is possible with strong listing visuals
-
32% more buyer engagement on platforms like Zillow, Realtor.com, and Facebook Ads
Why Buyers Respond to HDR:
-
Balanced lighting creates inviting, livable spaces
-
Clear window views build emotional connection to surroundings (like a garden, pool, or skyline)
-
Vibrant, natural colors elevate mood and impression
-
Visual transparency helps buyers trust what they see—leading to quicker decision-making
HDR photography allows you to tell a story: not just “this is a room,” but “this is a lifestyle.” That emotional impact is what drives clicks, calls, and conversions.
But Quality Matters…
Poorly done HDR—flat lighting, blurry frames, over-the-top saturation—can backfire and make your listing look unprofessional. That’s why serious agents and photographers trust experts.
At WeFixPix, we combine advanced HDR blending techniques with real estate-specific editing workflows to deliver:
-
Eye-catching, conversion-optimized listing images
-
Fast turnaround (within 24 hours)
-
Consistency across entire property photo sets
-
Formats tailored for MLS, print, and online platforms
Ready to stop losing buyers to bad photos?
Let WeFixPix help you unlock the full power of HDR and elevate your property listings from average to unforgettable.
7. Don’t DIY? Let WeFixPix Handle It
Creating high-quality HDR Real Estate Photos takes time, technique, and editing know-how. But if you’re a busy agent, property manager, or real estate photographer juggling multiple listings, learning HDR from scratch may not be the best use of your time.
That’s where WeFixPix comes in.
We offer specialized HDR photo editing services designed specifically for real estate professionals. Whether you send us bracketed exposures from a DSLR or basic images from a smartphone, we’ll transform them into polished, natural-looking photos that stand out and sell.
With WeFixPix, You Get:
-
Professional HDR blending using advanced layer and tone-mapping techniques
-
Window pulls, color correction, deghosting, and straightening
-
MLS- and ad-ready exports in multiple resolutions
-
Fast turnaround—typically within 24 hours
-
Affordable pricing with bulk discounts for agencies and photographers
You don’t need fancy gear or technical expertise—just upload your photos, and we’ll do the rest.
Ready to Get Started?
Whether you’re launching your first listing or managing dozens each month, WeFixPix helps you deliver a professional visual experience—every single time.
Try us today and get 3 HDR edits for FREE.